This guide will walk you through the process of adjusting the ambient lighting settings within the Filmlight Pro application by Studiovity. By following these simple steps, you can accurately simulate various lighting conditions for your project.
Step 1: Access the Ambient Settings Panel

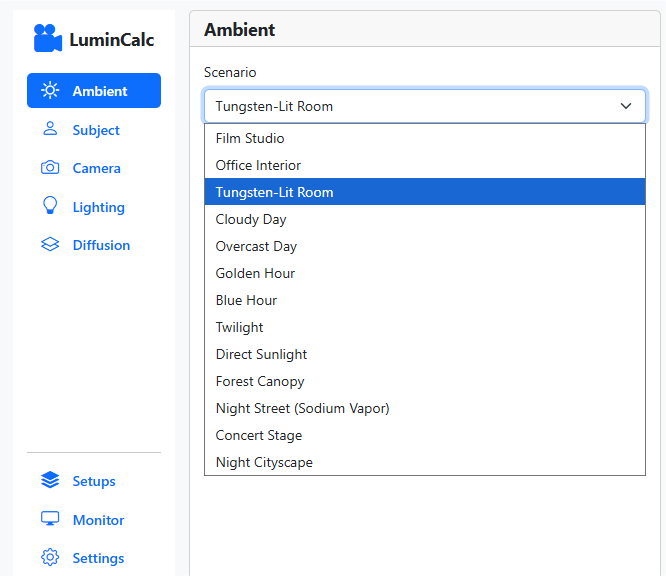
Click on the Ambient icon to open the dedicated panel for managing your ambient lighting environment. This is where you will define the overall mood and light level of your scene.
Step 2: Select a Lighting Scenario

Once you’re in the Ambient panel, you will see a dropdown menu labeled “Scenario.” Click on this menu to reveal a list of pre-defined lighting situations. You can choose from a variety of settings such as “Tungsten-Lit Room,” “Overcast Day,” “Twilight,” or “Direct Sunlight” to quickly establish the base lighting for your shot.
Step 3: Define the Illuminance (Lux) Level

fter selecting your scenario, you can fine-tune the amount of light in the environment, also known as illuminance. You have two options for this:
Automatic Selection:
The program provides a set of standard illuminance values. You can simply choose one from the dropdown menu to apply a balanced and realistic light level for your chosen scenario.
Custom Control:
For precise control, activate the Manual Override toggle. This will allow you to type in a specific, custom illuminance value in lux, giving you complete flexibility to set the exact amount of light you need.


